Build Mobile Apps with Tailwind CSS, Next.js, Ionic Framework, and Capacitor

A very popular stack for building responsive web apps is Tailwind CSS and Next.js by Vercel.
Tailwind, a utility-first CSS framework that replaces the need to write custom class names or even any CSS at all in many cases, makes it easy to design responsive web apps through small CSS building blocks and a flexible design foundation.
Next.js, a React framework for building high performance React apps, is one of the leading environments for building production React apps on the web.
As these technologies have grown, they are increasingly used together for web app development (in fact, Next.js is working on an RFC for official Tailwind integration). This has prompted many users of these projects to ask whether they can be used to build mobile apps, too.
Turns out, they can! And they make a great fit for cross-platform mobile development when paired with Ionic Framework and Capacitor.
As I started playing with these technologies, I realized that each had a natural fit in a combined mobile stack, and I wanted to put together a solid starting foundation for others interested in building real iOS and Android apps using these technologies.
If you’re confused by all the project names and how they work together, don’t worry, I’ll break down each part of the stack each project is concerned with, along with some visuals and code samples demonstrating how all the projects work together. At the end I’ll share a starter project with these technologies installed and working together that can form the foundation of your next app.
The Stack Visualized

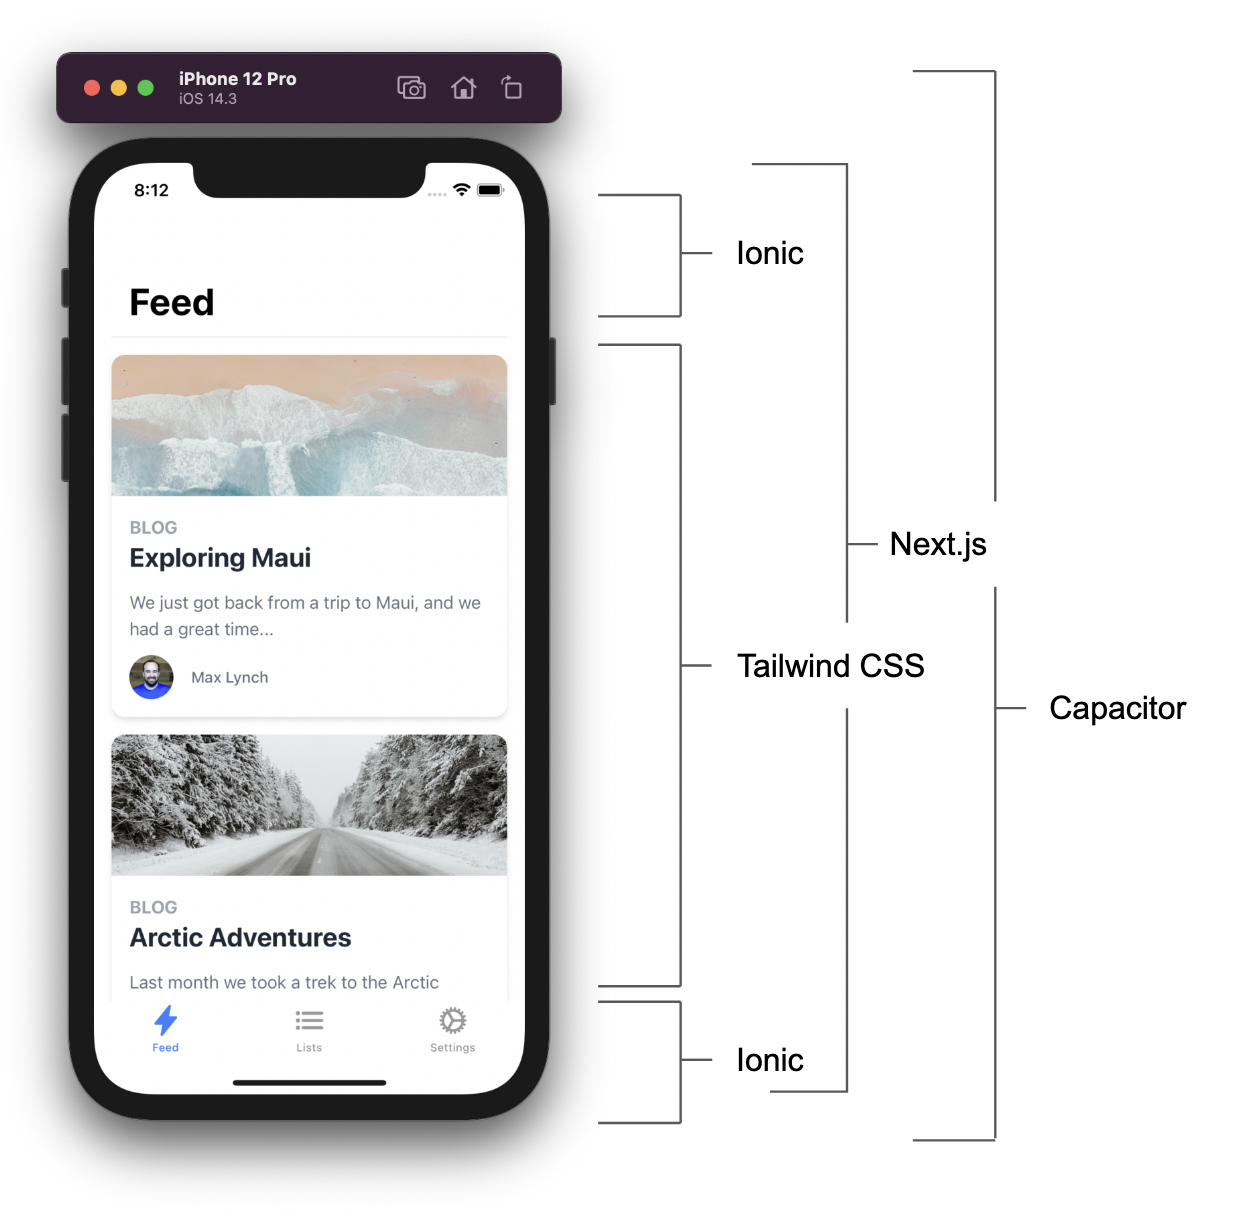
The above is a live screenshot of an React app built with Next.js that is using Ionic Framework and Tailwind for the UI experience, and Capacitor to natively deploy that app to iOS and provide access to any Native APIs the app uses.
There are a lot of projects working in tandem to provide the full experience here. To visualize it, I’ve tried to overlay the different layers and how they correspond to each project in this diagram above.
We can see that Capacitor is concerned with the entire app and device layer of the app, Next.js is concerned with the entire web/React app our code and UI is running in, then Ionic handles the “platform UI” including navigation toolbar (including system title and toolbar buttons) as well as the bottom tabs.
Finally, Tailwind is used to then style and customize the content of each page, which is where the bulk of the app-specific styling will occur.
Mobile UI and Native Runtime
If your experience building with web technologies is primarily for desktop or responsive sites, you might not be familiar with mobile-focused libraries Ionic Framework and Capacitor.
Ionic Framework is a cross-platform, mobile-focused UI library for the web. It provides ~100 components that implement platform UI standards across iOS and Android. Things like toolbars, navigation/transitions, tabs, dialog windows, and more. The big draw is those components work on the web and work in frameworks like React, Angular, Vue, or plain HTML/CSS/JS.
Ionic Framework is highly popular and powers upwards of 15% of apps in the app store.
Historically, Ionic Framework would be paired with a project like Cordova which provided the native iOS and Android building and runtime capabilities. However, most new Ionic Framework apps use Capacitor for this part of the stack.
Capacitor is a project built by the team behind Ionic Framework focused on the native side of a web-focused mobile app.
Capacitor provides a plugin layer and runtime that runs web apps natively on iOS, Android, Desktop, and Web, and provides full access to device APIs and features (including extending the web environment by writing additional native Swift/Java code).
As such, any popular web technologies and libraries can be used to build mobile apps with Capacitor, and then deploy the same apps with the same code to the web and desktop.
And, to top it all off, Capacitor was just rated the second highest in satisfaction among popular Mobile & Desktop Tools on the State of JS 2020 Survey! If your last experience with this mobile development approach was with Cordova, we think you’ll find Capacitor to be a big improvement.
Introducing the Next.js + Tailwind CSS + Ionic Framework + Capacitor Starter
Now that you have a sense for how these technologies all work together to make it easy for web developers to build mobile apps, let’s take a look at a real demo and starter project (GitHub repo):

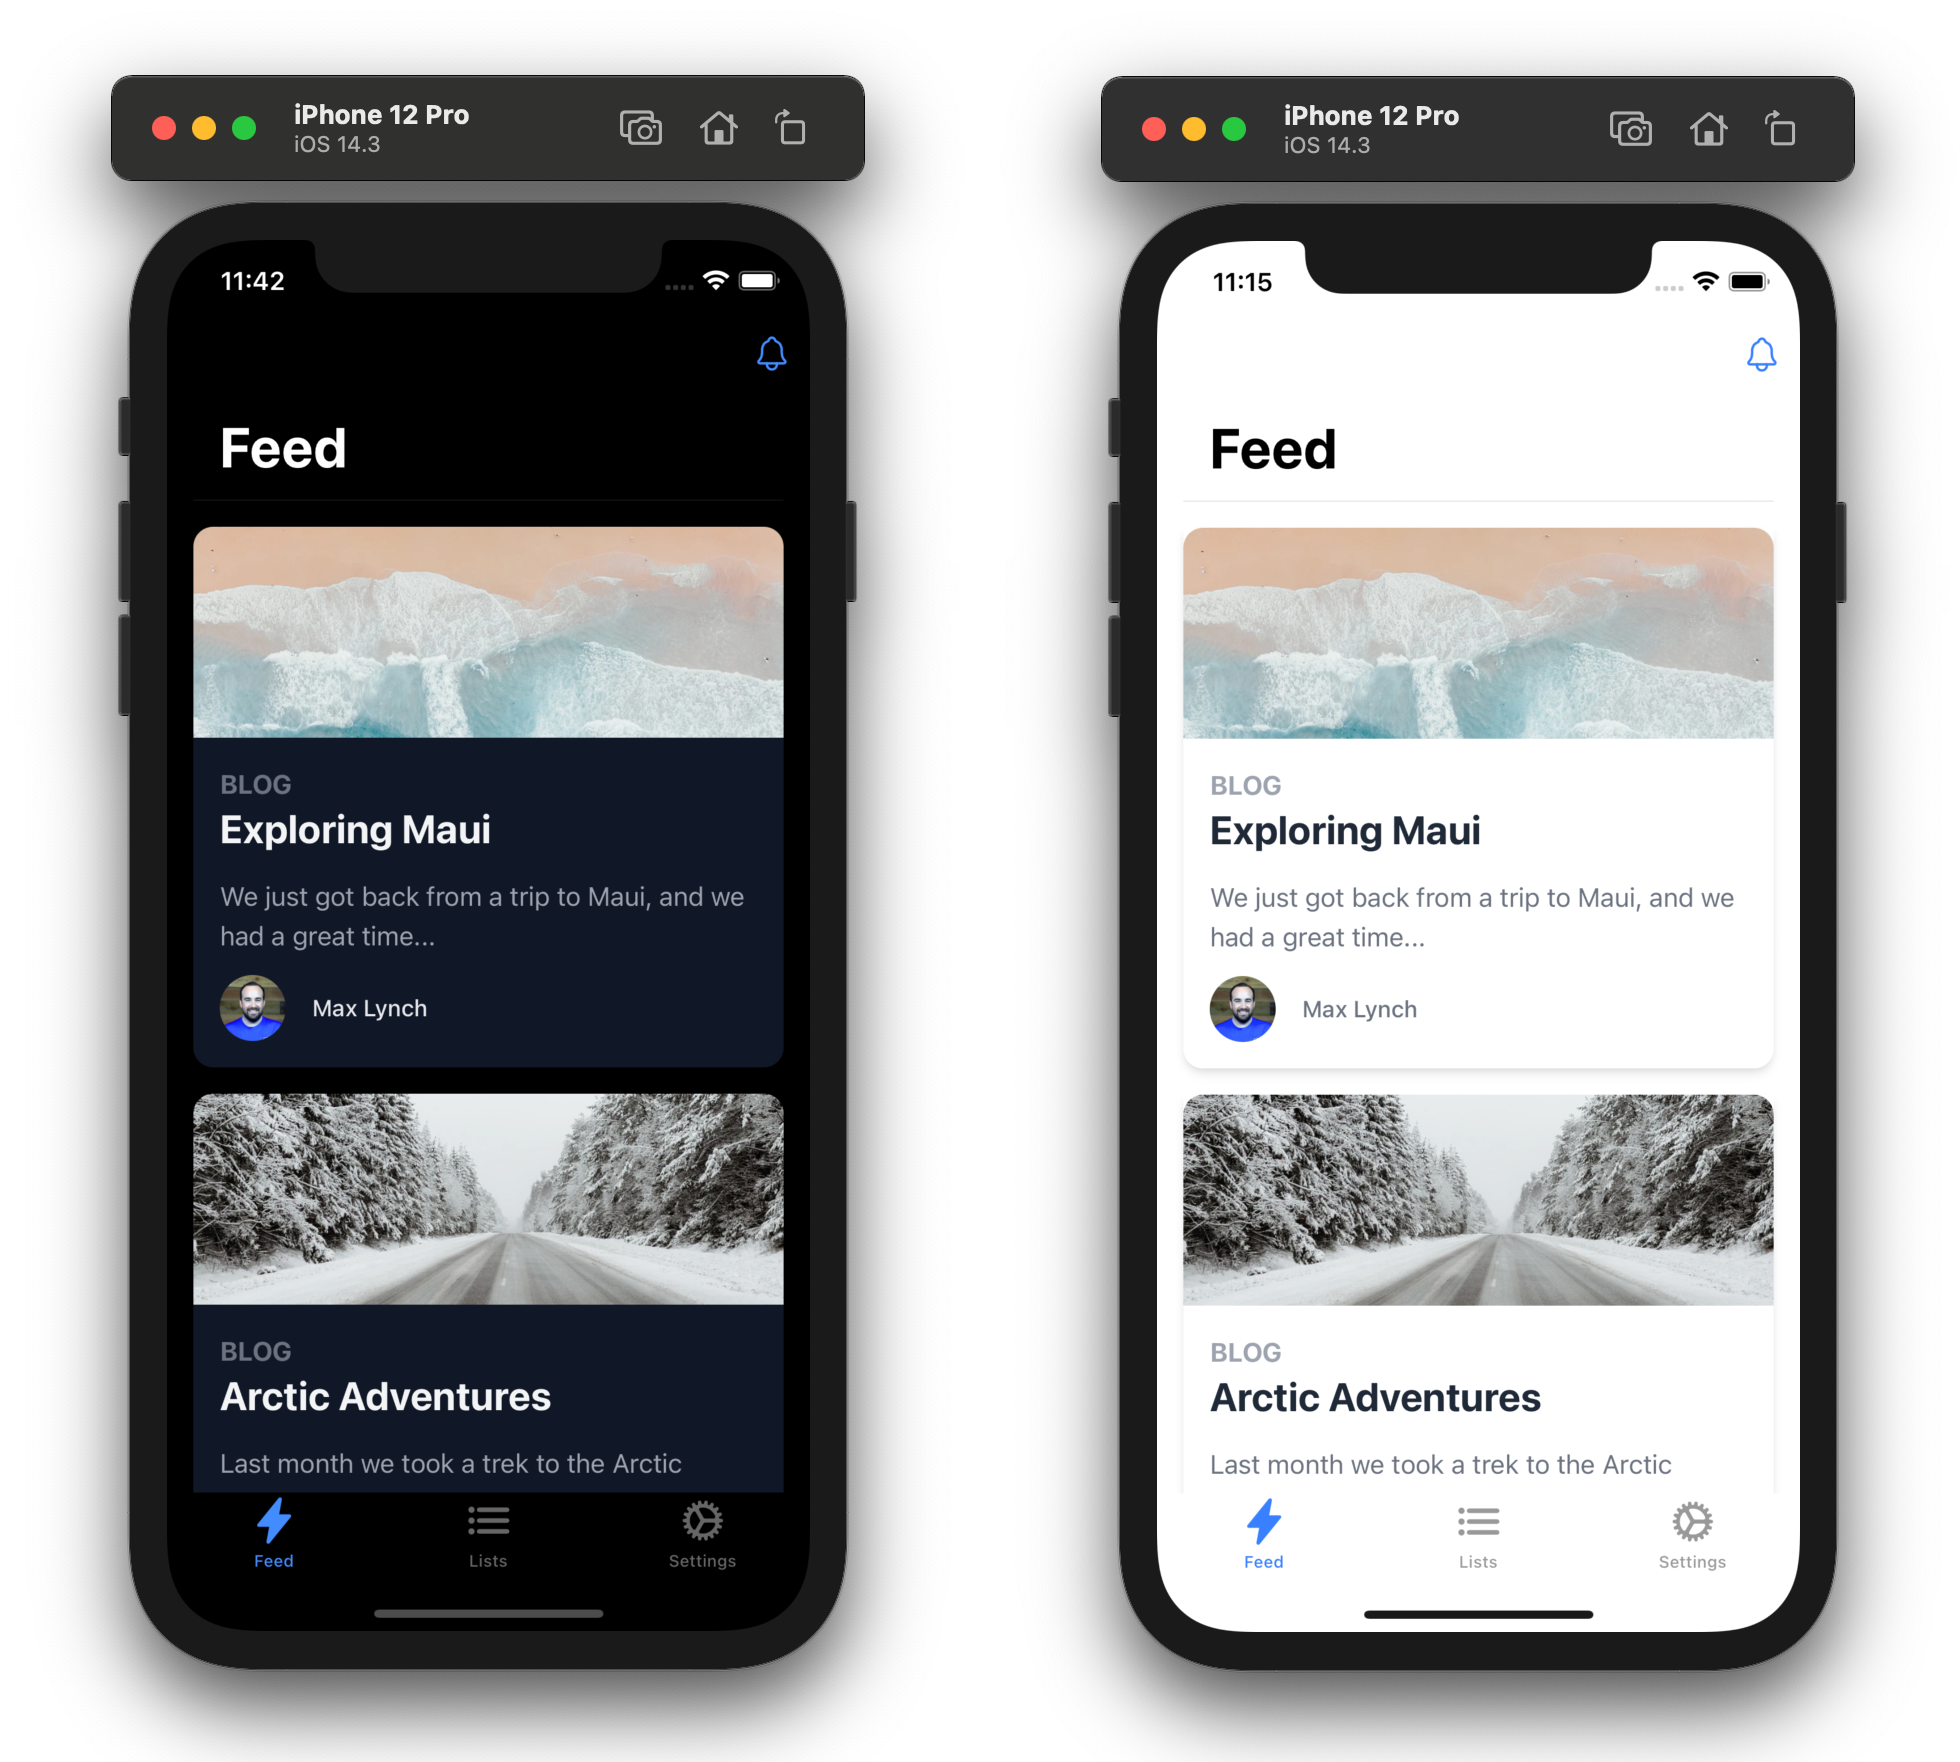
Let’s take a look at the main Feed page (seen above in the screenshot) for an example of how the different technologies in use work together:
import {
  IonPage,
  IonHeader,
  IonToolbar,
  IonTitle,
  IonButtons,
  IonButton,
  IonIcon,
  IonContent,
} from '@ionic/react';
import { useState } from 'react';
import { notificationsOutline } from 'ionicons/icons';
import Notifications from './Notifications';

import Card from '../ui/Card';
import { getHomeItems } from '../../store/selectors';
import Store from '../../store';

const FeedCard = ({ title, type, text, author, authorAvatar, image }) => (
  <Card className="my-4 mx-auto">
    <div>
      <img className="rounded-t-xl h-32 w-full object-cover" src={image} />
    </div>
    <div className="px-4 py-4 bg-white rounded-b-xl dark:bg-gray-900">
      <h4 className="font-bold py-0 text-s text-gray-400 dark:text-gray-500 uppercase">
        {type}
      </h4>
      <h2 className="font-bold text-2xl text-gray-800 dark:text-gray-100">
        {title}
      </h2>
      <p className="sm:text-sm text-s text-gray-500 mr-1 my-3 dark:text-gray-400">
        {text}
      </p>
      <div className="flex items-center space-x-4">
        <img src={authorAvatar} className="rounded-full w-10 h-10" />
        <h3 className="text-gray-500 dark:text-gray-200 m-l-8 text-sm font-medium">
          {author}
        </h3>
      </div>
    </div>
  </Card>
);

const Feed = () => {
  const homeItems = Store.useState(getHomeItems);
  const [showNotifications, setShowNotifications] = useState(false);

  return (
    <IonPage>
      <IonHeader>
        <IonToolbar>
          <IonTitle>Feed</IonTitle>
          <IonButtons slot="end">
            <IonButton onClick={() => setShowNotifications(true)}>
              <IonIcon icon={notificationsOutline} />
            </IonButton>
          </IonButtons>
        </IonToolbar>
      </IonHeader>
      <IonContent className="ion-padding" fullscreen>
        <IonHeader collapse="condense">
          <IonToolbar>
            <IonTitle size="large">Feed</IonTitle>
          </IonToolbar>
        </IonHeader>
        <Notifications
          open={showNotifications}
          onDidDismiss={() => setShowNotifications(false)}
        />
        {homeItems.map((i, index) => (
          <FeedCard {...i} key={index} />
        ))}
      </IonContent>
    </IonPage>
  );
};

export default Feed;
As we can see, we use Ionic Framework controls (IonPage,
IonHeader, IonContent, IonToolbar, etc) for the structure of the page (these controls implement iOS and Android platform-specific styles and navigation/transition behavior), then we use Tailwind for the page content that is where our custom design lives (which will tend to be in
IonContent).
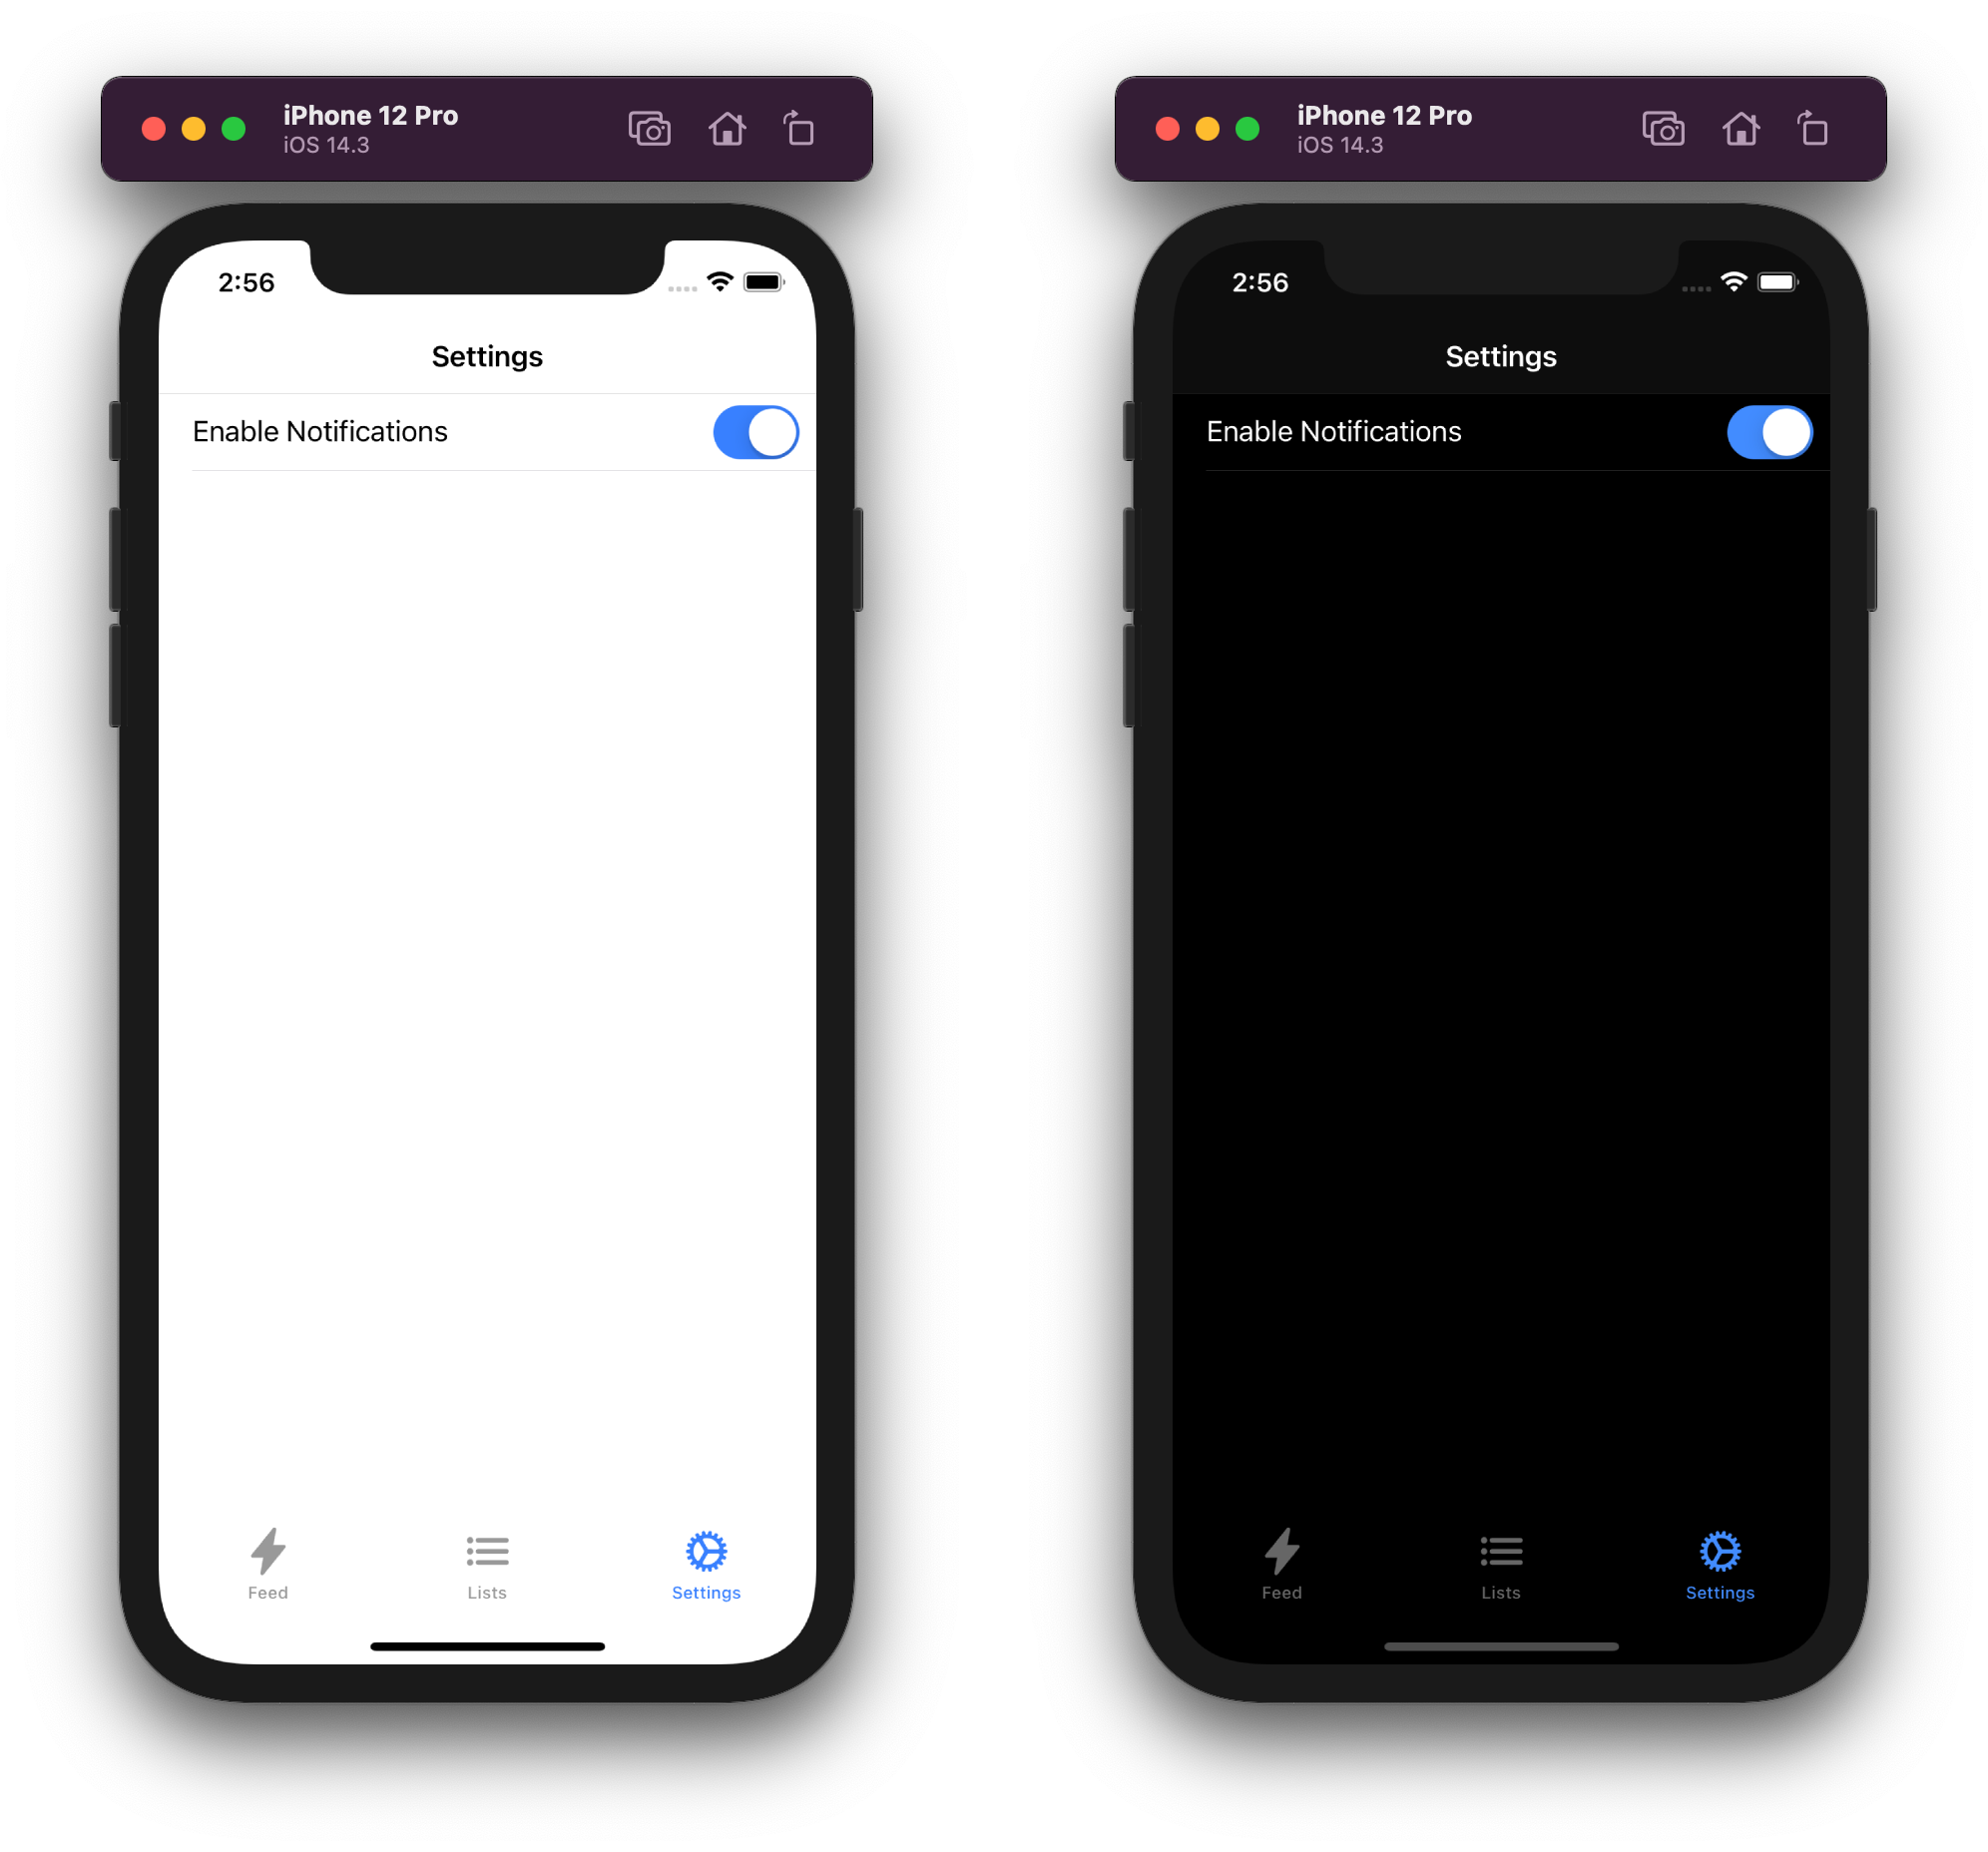
If we look at another page that is just a simple list, we see that we don’t use Tailwind at all, because the user would expect this page to be a standard iOS/Android list and toggle button (code here):

So, we tend to use Tailwind more for pages with a lot of custom design and assets. That’s by design. Generally when building a native mobile app, we want to use platform conventions as much as possible, especially for experience and performance-sensitive elements like Lists, Toolbars, Tabs, and Form inputs. However, for the
Feed page, which has a pretty custom UI experience, we end up getting a lot of mileage out of Tailwind.
So, in general, the way to think about when to lean more on Ionic Framework and when to lean on Tailwind is when your UI experience will heavily use typical mobile UI elements (prefer Ionic components) or when it will be more custom (prefer Tailwind).
Finally, this starter also comes with a few small opinions around folder structure and state management. For state management, the library pullstate is used which is a simple yet powerful state management library with a hooks-based API (I wrote more about it here). If want to use something else, removing it is easy.
Deploying to iOS and Android
The app can be easily deployed to iOS and Android using Capacitor and its local CLI tools. After running
npm install, you’ll have the
npx cap command available, which enables a native development workflow:
To add an iOS or Android native project:
npx cap add ios
npx cap add android
Then, to build the Next.js app, export it, and copy it to the native projects:
npm run build
npm run export
npx cap copy
This command is needed every time the built output changes. However, you can enable livereload during development (see the
README for more info).
Then, you can launch Xcode and/or Android Studio to build and run the native project:
npx cap open ios
npx cap open android
Next steps
If you’ve been interested in building mobile apps using popular web dev projects like Next.js or Tailwind, hopefully this starter provides inspiration and a solid foundation for building your next app using web technologies. It’s worth mentioning this exact same approach can be used with other UI libraries (like material, bootstrap, or your own!).
When you’re ready, dig into the starter project, follow the Capacitor and Ionic Framework docs, and get building!